
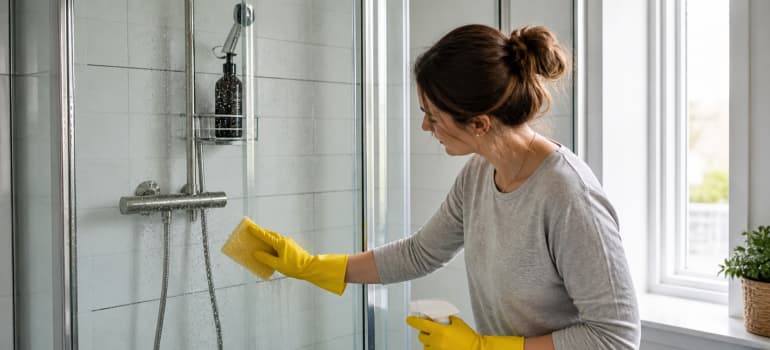
A shower that looks clean on the surface can be genuinely grim underneath. Soap scum builds up in layers you stop noticing. Grout turns grey, then darker. A faint smell creeps in that no amount of surface spraying shifts. If you’ve ever scrubbed for twenty minutes and stepped back to find it still looks dull, the problem isn’t your effort. It’s the method. Knowing how to deep clean a shower properly means targeting the right materials with the right chemistry, not just scrubbing harder.
Most guides give you the basics: spray, scrub, rinse. This one goes further. You’ll find out which tools actually make a difference, why some products work and others don’t, and how to deal with the stubborn stuff that routine cleaning skips entirely.
TL;DR
- Regular soap scum removal stops layers from bonding to tiles and glass.
- Steam cleaners are one of the most effective tools for grout and tiled surfaces.
- Limescale requires acid to dissolve it, not just scrubbing or standard cleaners.
- Glass shower doors stay cleaner longer when squeegeed after every use.
- Proper ventilation is the single biggest factor in preventing mould recurrence.
- Natural solutions like vinegar and baking soda handle most everyday shower grime effectively.
- Professional-grade tools save significant time and produce noticeably better results on problem areas.
Table of Contents
How Do You Deep Clean a Shower Properly?
To deep clean a shower effectively, work from top to bottom and treat each surface type separately. Start with the showerhead and fixtures, move to tiles and grout, then tackle glass doors and finally the tray or floor. Use an acid-based solution on limescale, a baking soda paste on grout stains, and a squeegee plus microfibre finish on glass. Rinse thoroughly between products.
The reason most people end up frustrated is that they treat the whole shower as one surface requiring one product. It isn’t. Tiles, grout, glass, chrome, and plastic all respond to different things. Soap scum on glass is a different problem from limescale on a showerhead, which is a different problem from mould in grout. Lumping them together and spraying a general bathroom cleaner across the lot means nothing gets properly clean.
Start by removing everything from the shower: bottles, razors, sponges. You can’t clean around clutter. Then soak the showerhead in white vinegar if there’s any visible limescale or reduced water flow. That can sit while you work on the rest. Work your cleaning solution into tiles and grout and let it dwell for at least five to ten minutes before scrubbing. Chemistry needs time. Rushing it means more effort for worse results.
For a thorough session, you’ll need: a stiff grout brush, a microfibre cloth, a squeegee, white vinegar, baking soda, and ideally a steam cleaner if you have access to one. That combination covers the majority of what accumulates in a shower over weeks or months of regular use.
How Do You Clean Shower Tiles and Grout Effectively?
Tiles are the easy part. The grout lines are where the real problem hides. Grout is porous — it absorbs soap residue, moisture, and skin cells, and over time it turns from white or cream to a shade of grey that no surface spray touches. Mould takes hold in those same lines because the conditions are almost perfect: warm, damp, with a food source readily available. Cleaning tiles without properly addressing grout is half a job at best.
These methods work for both routine deep cleans and tackling grout that’s been neglected for a while:
- Baking soda paste for stubborn stains – Mix baking soda with just enough water to form a thick paste, apply it directly to the grout lines, leave it for ten minutes, then scrub with a stiff brush. The mild abrasive action lifts staining without damaging the grout itself.
- White vinegar to break down grime – Spray undiluted white vinegar over tiles and grout and allow it to sit. The acidity cuts through soap scum and surface mineral deposits. Combine it with the baking soda paste for a more aggressive clean on problem areas.
- A dedicated grout brush or scrubber – An old toothbrush will do the job eventually, but a proper narrow grout brush with stiff bristles covers the lines far faster. On larger tiled areas, an electric scrubber with a brush head attachment saves your wrists and works product into the texture of the grout more effectively.
- Steam cleaning for a chemical-free deep clean – A steam cleaner with a narrow nozzle attachment forces pressurised steam directly into grout lines, loosening grime and killing bacteria without any product at all. Follow up with a cloth to wipe away what’s been lifted.
- Rinse fully and dry after cleaning – Leaving cleaning residue on tiles, especially vinegar, can dull certain surface finishes over time. Rinse with warm water and dry with a cloth or squeegee to stop water spots forming immediately after you’ve cleaned.
One thing worth knowing: if the grout has turned black and isn’t responding to any of the above, it may be mould that’s penetrated below the surface. At that point, the grout may need re-sealing or replacing. No amount of scrubbing fixes structurally compromised grout.
How Do You Remove Limescale from a Shower?
Limescale is mineral residue, not dirt. When hard water evaporates, it leaves calcium and magnesium deposits bonded to whatever surface it was sitting on. That distinction matters because cleaners designed for general bathroom dirt do almost nothing to limescale. You need acid — something acidic enough to break the calcium bonds without damaging the surface underneath.
The UK has some of the hardest water in Europe, particularly across the south-east and east of England. If you’re in one of those areas, limescale isn’t a sign of poor cleaning. It’s just chemistry working against you, and it needs a consistent response.
Match your approach to the severity of the build-up when cleaning limescale:
- Vinegar soak for mild limescale – Wrap a cloth soaked in white vinegar around the affected fixture, or fill a bag with vinegar and secure it over the showerhead. Leave it for an hour, or overnight for best results. The acetic acid dissolves light mineral build-up without any scrubbing.
- Baking soda and lemon for moderate cases – Combine baking soda with lemon juice to form a paste. Apply it to scaled surfaces, leave it for fifteen to twenty minutes, then scrub and rinse. Lemon juice contains citric acid, which works similarly to vinegar on moderate deposits and has a more tolerable smell.
- Commercial descaling agents for severe build-up – When limescale has been accumulating for months and natural acids aren’t shifting it, a dedicated descaler with a higher acid concentration is the appropriate tool. Follow the product’s contact time instructions precisely. Leaving it too long on chrome or certain finishes can cause surface damage.
One more thing worth being clear on: a steam cleaner will not remove heavy limescale. It loosens surface grime and kills bacteria, which is useful, but mineral deposits are chemically bonded to the surface. Steam has no acid content. Use the vinegar or descaler first, then follow with steam if you want a thorough finish.
How Do You Clean Glass Shower Doors Without Streaks?
Glass shower doors look terrible when they’re coated in soap scum and water spots, and they look almost new when they’re properly clean. The problem is that most people clean them the same way they clean tiles. That doesn’t work. Glass needs a different approach.
Soap scum on glass is a combination of fatty acids from soap and minerals from the water. It bonds to the surface and builds up with every shower. A general bathroom spray will break the surface layer, but older layers underneath need something more targeted. A fifty-fifty mix of white vinegar and warm water, sprayed on and left for five to ten minutes, cuts through soap scum effectively. Apply it, let it work, then scrub with a non-scratch pad and rinse well.
Water spots are a separate issue. They’re pure mineral deposits left behind when droplets evaporate on the glass. The vinegar solution handles both at once, which is convenient. After rinsing, dry the glass immediately with a squeegee rather than a cloth. A squeegee removes water in one pass without leaving lint or streaking.
For a polished finish, buff with a clean, dry microfibre cloth after squeegeeing. Microfibre picks up the last residue and leaves glass genuinely streak-free in a way that paper towels and regular cloths don’t. If you want to extend the time between deep cleans, apply a water-repellent coating to the glass. These treatments cause water to bead and run off rather than sitting and evaporating, which dramatically reduces mineral build-up over time.
The single most effective maintenance habit is squeegeeing the doors after every shower. It takes about thirty seconds. It won’t eliminate the need for a proper clean, but it means you’re doing it far less often.
Do Natural Cleaning Solutions Work on a Shower?
For routine deep cleans on a reasonably maintained shower, yes — vinegar, baking soda, and lemon juice cover most of what you’re dealing with. They’re cheap, safe to use without gloves or ventilation warnings, and effective on soap scum, light limescale, and general surface grime. Severe mould or months of heavy limescale will need something stronger, but they’re not the everyday scenario.
There’s a practical case for natural solutions that has nothing to do with environmental preference. You’re using them in an enclosed space that your family touches daily, and you don’t need to worry about what’s going down the drain or building up on surfaces between rinses.
- Vinegar and water spray – A fifty-fifty solution in a spray bottle handles soap scum, light limescale, and general surface grime on tiles and glass. It works best when left to dwell for several minutes rather than sprayed and immediately wiped off.
- Baking soda paste – Combined with a small amount of water or liquid soap, baking soda makes a gentle abrasive paste that cleans grout, scrubs tile surfaces, and lifts staining without scratching. It also neutralises odours, which is useful in a space that stays damp.
- Lemon juice on fixtures and chrome – Fresh lemon juice applied to metal surfaces, left for a few minutes, then buffed off with a cloth removes light limescale and leaves a clean finish. The citric acid does the work, and the smell is considerably more tolerable than vinegar.
One practical note: don’t mix vinegar with anything containing bleach. The combination produces chlorine gas, which is not what you want building up in a small bathroom. If you’re switching between products in the same session, rinse surfaces thoroughly first.
Which Tools Make the Biggest Difference When Deep Cleaning a Shower?
Most cleaning guides assume you’ll use whatever’s under the kitchen sink and a sponge from the supermarket. That’s fine for maintenance. For a proper deep clean, especially on grout and heavily scaled surfaces, the right tools make a disproportionate difference to both the result and the time it takes.
A steam cleaner is the most versatile tool for shower deep cleaning. The pressurised steam reaches temperatures that kill bacteria and mould spores on contact, without requiring any chemical product. A narrow nozzle attachment forces steam directly into grout lines, lifting embedded grime that a brush alone won’t shift. It’s also effective on glass, fixtures, and the shower tray. If anyone in the household has skin sensitivities or allergies, a steam cleaner means you can get the space genuinely hygienic without product residue left behind on surfaces.
A quality grout brush makes a noticeable difference on tiled surfaces. The bristles are stiff enough to scrub without flexing away from the grout line, which is the problem with most general-purpose bathroom brushes. An electric scrubber with interchangeable heads takes this further on larger tiled areas where hand scrubbing becomes tiring. The rotating or oscillating action works product into the surface more effectively than manual effort alone.
A good squeegee with a rubber blade that sits flush against glass is worth having. Cheap ones leave streaks because the blade doesn’t maintain even contact across the surface. It’s a small thing, but the difference shows immediately on glass doors.
For anyone who wants a professional-level result throughout the home, a one-off cleaning service covers every room systematically, using professional equipment and methods that go well beyond a standard domestic clean. It’s worth knowing the option exists when a property needs bringing back up to a high standard quickly.
How Do You Stop Mould Coming Back in a Shower?
Control moisture. Mould doesn’t grow because a shower is dirty. It grows because the conditions are right: warm temperature, high humidity, and a damp surface. Remove one of those factors consistently, and mould stops recurring. Clean matters, but what you do between cleans determines whether the problem keeps returning.
These habits address the root cause rather than just the visible result:
- Improve bathroom ventilation – Run the extractor fan during every shower and for at least fifteen to twenty minutes afterwards. If you don’t have an extractor, open a window. Humidity that has nowhere to go settles on every surface and creates exactly the conditions mould needs to establish itself.
- Use a daily shower spray – A spray applied after showering, without rinsing off, inhibits soap scum build-up and keeps surfaces less hospitable to mould. It doesn’t replace a periodic deep clean, but it substantially lengthens the time between them.
- Remove excess moisture after every shower – Squeegeeing tiles and glass removes the standing water that would otherwise sit, evaporate, and leave mineral residue while keeping surfaces damp. It takes less than a minute and makes a significant difference to how quickly grime accumulates.
- Check and reseal any sealant gaps promptly – Water that gets behind tiles or into gaps in the sealant around the shower tray creates hidden damp, which produces mould you can smell but can’t always see. Check the sealant periodically and reseal if there are any cracks or lifting sections.
Ventilation is the factor most people underestimate. A bathroom with a functioning extractor fan and a window that gets opened will stay cleaner, smell better, and need far less intervention than an identical bathroom that stays sealed and humid after every shower. That’s not an opinion. It’s how mould biology works.
Want your bathroom deep cleaned professionally?
Enter your postcode to view our rates and availability in your area.
For questions about the services we offer visit our main site
Conclusion
A clean shower doesn’t come from effort alone. It comes from using the right approach on the right surface, letting products do the work they’re designed for, and then maintaining what you’ve achieved with a few consistent habits. Deep cleaning a shower well once takes less time than half-cleaning it repeatedly and wondering why it still looks dull.
Tackle tiles and grout first, deal with limescale properly using acid rather than effort, clean glass with something that actually works on soap scum, and then keep moisture under control between cleans. Do that consistently and the job becomes progressively easier every time you do it.





Leave a Reply