When it is time to do the housework, one of the most dreaded tasks is cleaning the oven. Usually, these appliances are covered in baked-on grease and food splatters that are so tough to remove you would think they have melded with the oven walls.
We understand how tedious and frustrating this process can be, so we have created a thorough oven cleaning guide to make this process a lot easier for you. Complete the job faster and spend less time covered in old oven grease with our instructions and tips!
Table of Contents
When it comes to cleaning, the type of oven matters!
Learning about the specifics of your oven is essential for cleaning. Conventional ovens, for example, may need a little bit more effort—think soapy sponges and gentle cleaning for burnt-on spots.
Gas ovens offer an extra layer of complexity: while they provide precise temperature control and quick heat adjustments, their sophisticated components can trap grease in hard-to-reach areas, requiring a thorough inspection and more cleaning.
Electric ovens are often easier to maintain, although burnt-on food can stick stubbornly to coils or heating components. The material also matters, as an oven may come with enamel trays, which require specific care and may not react well with highly acidic cleaners like vinegar.
Regardless of the type of oven you have, it most likely comes with specific cleaning and maintenance instructions from the manufacturer, so it’s worth checking these out before you attempt any deep oven cleaning.
How do you clean a very dirty oven?
There is an untold number of natural oven cleaning guides online, but through countless hours of research and experience, we were able to identify the most widely used and reliable eco-friendly method. Unsurprisingly, this method includes some of the most versatile products – baking soda and vinegar.
Before you tackle the oven and declare yourself the oven cleaning champion, you will need some supplies.
What to use to clean the oven?
- Approximately half a cup of baking soda;
- Water;
- Rubber gloves;
- A cloth;
- Sponge and scouring pad (preferably a non-scratch);
- White vinegar;
- A spray bottle.
- Empty the oven – The first step is removing the shelves and trays. Once removed, set them aside for now.
- Prepare the cleaning solution – Mix the baking soda with three or four tablespoons of water in a bowl, then mix them together to form a paste.
- Apply the cleaner – Put on your rubber gloves and spread that paste around the inside of your oven. Avoid covering the grill or other heating element, though. Leave the paste to sit for at least twelve hours. This will allow the baking soda to soften the charred food particles and baked grease, significantly shortening the scrubbing time.
- Take care of the baking trays and racks – While waiting for the baking soda paste, clean the oven racks and baking trays in warm, soapy water with a scouring pad (a metal wire brush could be used, but only on surfaces that allow it). If there’s a lot of grease and remnants of burnt-on food, then you can try some soaking first. Soak the trays in a solution of dishwashing liquid and hot water, or for even better results, use Enzyme Laundry Detergent. Read the label for guidelines. Leave to soak for a few hours or overnight before scrubbing and washing the shelves and trays.
- Time for some scrubbing – When the twelve hours have passed, wipe the inside of the oven with a damp cloth to remove as much of the dry baking soda paste as you can.
- Spraying with vinegar – Next, spray the inside of the oven with white vinegar, paying particular attention to areas still covered in baking soda. Don’t be alarmed when the baking soda starts to fizz; this is perfectly natural.
- Final rinse and reassembly – Wipe the inside of the oven once again with the damp cloth to remove the remaining fizzy baking soda, dirt, and grease. Put the shelves back, and you’re good to go.
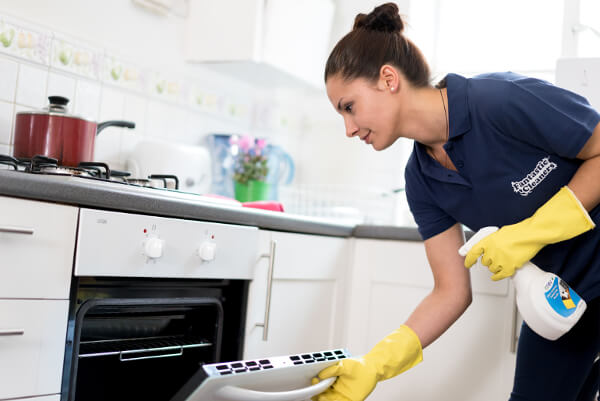
How do professionals clean ovens?
If you feel like thorough cleaning of the oven is not something you want to do yourself, there’s always the option of leaving that to professional cleaners. Their experience and knowledge have naturally taught them how to tackle this task in the fastest but also most effective way.
This is what you can usually expect from a professional oven cleaning:
- Once you set your appointment, the cleaners will arrive, carrying all of the necessary cleaning products and tools for the job.
- Then, they will check on your oven and secure the area around the appliance with reusable protective mats.
- They will proceed to detach the removable parts of your oven so they can be deep cleaned separately in a dip tank.
- The cleaners will then take care of all external and internal parts of your oven like the floor, roof, walls and door, eliminating all burnt-on food and greasy spots.
- The oven cleaning experts will then take care of the part of the appliance that have been soaking up. After the treatment, any stains or residue will be easy to remove.
- Finally, everything will be wiped dry and reassembled, and your oven will be ready for use.
How long does it take to clean an oven?
Professional cleaners usually need 1-2 hours to clean an oven. Still, the condition and size of the appliance could affect the duration. The same applies if you decide to clean your oven on your own. If you’ve been skipping on the scrubbing for a while, then the cleaning process can take up to half a day or even more.
What not to do when cleaning your oven?
Now that you know what to do, it’s also important to point out what to avoid so your appliance remains clean and in perfect condition, serving you for many more years.
Cleaning only with harsh products
A common mistake is the use of steel wool or highly abrasive scrubbers on the oven. Sure, they promise a shining finish and the quick removal of those baked-on greasy stains, but they can also easily leave behind a scratched-up surface.
Harsh cleaning tools can strip away your oven’s protective coatings and lead to rusting over time. Still, if you are used to them and wish to continue using them, make sure the elements of the oven you want to clean are protected and the material will remain intact.
Relying on harsh chemical cleaners also poses risks for your health. Even with good rinsing, some residue may remain and get transferred to your food as soon as you heap up your oven.
So always check the labels of the cleaning products you buy, and we can assure you that using homemade oven cleaning solutions like the one with baking soda and vinegar also provides good results.
Not checking manufacturer’s maintenance recommendations
As we’ve already mentioned, the type of oven plays a role when it comes to the cleaning. Even one application of the wrong product or use of incorrect tools can cause damage to surfaces, affecting your appliance’s look and also its functionality.
So, just to be on the safe side, take a few minutes to look through your oven’s manual and learn about the best cleaning practices. In case you’ve lost the manual, look up your appliance’s model or serial number, which is usually located on a label positioned on the oven door or on the appliance’s back.
Thinking that the self-cleaning function is enough
Many ovens, including some older models, have a self-cleaning mode. This option does not truly clean the appliance, though. The oven simply heats up to such a degree that grease and pieces of food are burnt into nothingness. While the self-cleaning mode may be useful in maintaining a basic level of oven cleanliness, it should not be used if there is a treasure trove of burnt food and grease that has built up.
The high temperatures can cause enough smoke to set off smoke detectors and, in cases of extreme grease build-ups, it may even cause a fire. Therefore, in addition to the self-cleaning cycle is good to throw in some scrubbing with suitable oven cleaner from time to time.
Not cleaning your oven regularly
The more often you postpone deep cleaning your cooking appliance, the harder and more time-consuming the whole process will be. Ideally, you should give your oven a full clean every 3 to 6 months, depending on how frequently you use it.
Keep an eye out for obvious signs that it’s time for cleaning, such as a burning smell when you turn on your oven or stubborn stains on the glass door. These indications will help you plan your next cleaning session. By being proactive about oven maintenance, you not only improve your appliance’s efficiency and expand its lifespan but also ensure that each meal you prepare will have great taste!
With the help of this guide, you will no longer have to feel soul-shaking dread when you remember to clean the oven. All you need to do is deep-clean your appliance once properly and follow this up with regular cleaning to make your oven a shiny centrepiece and reliable assistant in the kitchen.
Get an oven cleaning professional and save your time!
Enter your postcode to view our rates and availability in your area.
For questions about the services we offer visit our main site
Did we miss anything? Do you have any tips for cleaning ovens? Let us know in the comments below or give us a shout on social media!


Great Post