
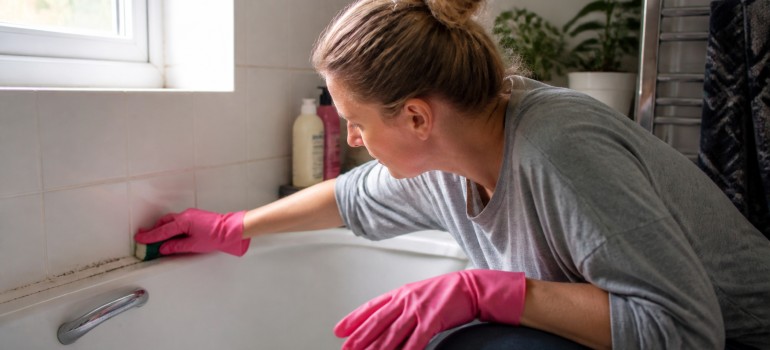
That dark, creeping line along your bath or shower sealant isn’t just an eyesore. It’s black mould, and once it takes hold in silicone, it tends to stay there. Wiping it with a damp cloth does nothing. A quick spray of general bathroom cleaner barely touches it. The mould is inside the silicone, not just sitting on top of it, which is why the usual approach fails.
The good news is that removing mould from silicone sealant is entirely possible with the right method. The bad news is that most people use the wrong one. This post covers what actually works, why certain products fail, and how to stop the mould coming back once you’ve dealt with it.
TL;DR
- Mould grows into silicone sealant, not just on the surface, which is why surface wiping rarely works.
- Bleach is the most effective household treatment: soak a cotton pad, press it against the sealant, and leave it for at least two hours.
- White vinegar works well on lighter mould and is a safer option for regular maintenance.
- Poor ventilation and trapped moisture are the main causes of mould on silicone sealant.
- Heavily discoloured or crumbling sealant needs replacing, not cleaning.
Table of Contents
How to Remove Black Mould from Silicone Sealant
To remove mould from silicone sealant effectively, you need a solution that penetrates the silicone surface rather than just sitting on top of it. Bleach-based products work best for established mould, applied via a soaked cotton pad left in contact with the sealant for at least two hours. For lighter mould, white vinegar applied the same way is a safer option that still gets results.
The key word there is contact time. This is where most people go wrong. They spray something on, wipe it off after a minute, and wonder why the staining is still there. Mould in silicone needs time to be broken down, not just a brief encounter with a cleaning solution. The method below makes the difference.
- Bleach: A diluted household bleach solution is the most effective treatment for stubborn or well-established mould on silicone. Soak cotton wool pads or strips of kitchen roll in the diluted bleach, press them directly onto the affected sealant, and leave them there for two to four hours. In severe cases, you can leave them overnight. When you remove the pads, the mould staining should be significantly reduced or gone entirely. Rinse the area thoroughly with clean water afterwards.
- White vinegar: For light mould growth or as a regular maintenance treatment, undiluted white vinegar works well. It’s acidic enough to kill most mould species without producing toxic fumes. Apply it the same way: soaked cotton pads left in place for an hour or two. It won’t clear heavy black mould staining the way bleach does, but it’s a much gentler option and perfectly appropriate for less severe cases.
- Bicarbonate of soda paste: Mixed with a little water to form a paste, bicarbonate of soda can be worked into the sealant surface with an old toothbrush. It’s mildly abrasive and has some antifungal properties. It won’t clear deep mould staining on its own, but it’s useful as a secondary step after vinegar treatment, or for general cleaning of lightly soiled sealant.
- Commercial mould remover gel: Several gel-based products are specifically formulated for mould on silicone and grout. They tend to combine a bleaching agent with a thickened carrier that keeps the solution in contact with the surface for longer. Products like HG Mould Spray and Astonish Mould & Mildew Blaster, both widely available at Screwfix, Wickes, and Homebase, are good examples of this type. They’re effective, though you need good ventilation and should avoid skin contact. Follow the product instructions carefully.
One honest point worth making: if the silicone is heavily discoloured all the way through, crumbling, or pulling away from the surface, no cleaning method is going to restore it. At that point, the sealant needs to be removed and replaced. Cleaning it is just delaying the inevitable.
How Do the Main Mould Removal Methods Compare?
Not every situation calls for the same approach. Here’s how the main methods stack up so you can choose the right one for your specific case.
| Effectiveness | Safety | Cost | Time Required | Best For | |
|---|---|---|---|---|---|
| Bleach solution | High. Clears even deep-set mould staining. | Requires ventilation, gloves, and eye protection. Do not mix with other cleaners. | Low | 2–8 hours contact time | Heavy or established mould |
| White vinegar | Moderate. Works well on light to moderate mould. | High. Non-toxic, no protective equipment needed. | Low | 1–2 hours contact time | Light mould, regular maintenance |
| Bicarbonate of soda paste | Low to moderate. Best as a supporting step. | Very high. Completely safe. | Very low | 20–30 minutes | Surface scrubbing, mild staining |
| Commercial mould remover gel | High. Formulated specifically for silicone and grout. | Moderate. Requires ventilation and skin protection. | Medium | 30 minutes to 2 hours | Moderate to heavy mould, convenience |
The bleach method is the most powerful option for stubborn staining, but it’s not always necessary. If you’re dealing with early-stage mould or just keeping on top of maintenance, vinegar is genuinely effective and far less harsh on your hands and lungs.
Step-by-Step Guide to Cleaning Mould off Bathroom Sealant
The bleach contact method consistently delivers the best results on established mould. Here’s how to do it properly.
How to remove mould from silicone sealant using the bleach contact method for the most effective results.
Ventilate the space
Open the window and switch on the extractor fan before you start. Bleach fumes build up quickly in small bathrooms and kitchens. Good airflow throughout the entire process is not optional. It’s essential. If the room has no window, work in short bursts with the door open.
Protect yourself
Put on rubber gloves and consider eye protection, particularly when working overhead on a shower seal. Bleach on skin is an irritant. In your eyes it’s a much bigger problem. Old clothes are a good idea too, because bleach splashes are permanent.
Prepare your cleaning solution
Dilute household bleach with water at roughly one part bleach to four parts water. You don’t need to go stronger than this. Pour the solution into a bowl or spray bottle. If you’re using a commercial mould remover gel, skip this step and use it directly as directed on the label.
Apply the solution and press it against the sealant
Soak cotton wool pads or strips of kitchen roll in the bleach solution until thoroughly wet. Press them firmly onto the mouldy sealant so they sit flush against it. This is the critical step: the soaked pad needs to maintain direct contact with the silicone surface, not just rest nearby. For horizontal sealant around a bath, this is straightforward. For vertical joints or sealant in a shower corner, secure the pads with a small piece of cling film to hold them in place.
Leave it for at least two hours
Walk away. Two hours is the minimum for moderate mould. For stubborn or long-standing staining, leave the pads in place for four to six hours, or overnight if needed. Resist the urge to check it every 20 minutes. Contact time is what does the work.
Remove the pads and rinse thoroughly
Peel away the cotton pads or kitchen roll and discard them. Rinse the sealant with clean water to remove all bleach residue. Use a cloth to wipe the area down. At this point, most or all of the mould staining should have lifted. If faint patches remain, repeat the process rather than scrubbing harder. Silicone is flexible but you can damage its surface with abrasive scrubbing.
Dry the area completely
Once rinsed, dry the sealant and surrounding tiles with a clean cloth. Leave the window open or the fan running for at least 30 minutes after you’ve finished. Putting the room back into a damp state immediately after cleaning is counterproductive. Give it time to air out fully before the next shower or bath.
How Do You Stop Mould Coming Back on Silicone Sealant?
Cleaning mould off silicone works, but it’s far better to slow the regrowth down from the start. Most of these steps take less than a minute and make a real difference over time.
- Ventilate every time you shower or cook. Run the extractor fan during and for at least 15 minutes after showering. If you have a window, open it. The goal is to get the humidity down as quickly as possible after producing steam.
- Dry the sealant after use. A quick wipe with a squeegee or dry cloth after your shower takes 20 seconds and dramatically reduces the moisture left on sealant. It’s a small habit with a disproportionate impact.
- Clean the sealant regularly. A monthly wipe with diluted white vinegar keeps soap scum and early mould growth in check. You’re removing the mould’s food source before it has a chance to establish itself.
- Use mould-resistant silicone sealant. When it’s time to reseal, choose a product that contains fungicide. It won’t prevent mould indefinitely, but it significantly slows down regrowth compared to standard silicone.
- Check for leaks or water ingress. Sealant that’s constantly wet because of a slow leak behind the bath or shower tray is fighting a losing battle. If the sealant is always damp even when the room is well-ventilated, check whether water is getting in somewhere it shouldn’t be.
- Don’t leave damp towels or mats against the sealant. Bath mats and towels left pressed against the sealant line trap moisture against it. Hang them up to dry away from the sealed edges.
- Replace old or damaged sealant promptly. Cracked or lifting sealant lets moisture get behind it, which creates a mould problem you can’t clean from the surface. Replacing it when it deteriorates is cheaper and easier than dealing with what grows behind it.
For persistent problem areas that keep returning despite good maintenance habits, mould and mildew cleaning treatment from a professional service covers the full surface including areas behind fittings and fixtures, reaching mould that surface-level cleaning can’t address.
Frequently Asked Questions
Can black mould on silicone make you ill?
Mould in a bathroom produces spores that circulate in the air. For most people, the effect is minor: some irritation, a musty smell, or aggravated hay fever symptoms. For people with asthma, respiratory conditions, or compromised immune systems, regular exposure to mould spores can cause more significant issues. It’s a good reason to address it promptly rather than ignoring it, even if the mould looks minor.
How do I know if I need to replace the sealant rather than clean it?
If the sealant is pulling away from the tiles or bath surface, crumbling, or has gone a permanently yellow or brown colour that doesn’t respond to cleaning, it needs replacing. Mould that has penetrated the full depth of the sealant, leaving it dark grey or black all the way through, is also a sign that cleaning won’t fully restore it. At that point, removing the old sealant and reapplying fresh material is the only reliable fix.
Is it safe to use bleach on coloured silicone sealant?
Standard household bleach can strip the colour from tinted or coloured silicone sealants. If your sealant isn’t white, test a small hidden area before treating the whole length. White vinegar is a safer starting point for non-white sealants. It’s less likely to cause discolouration while still being effective against lighter mould growth.
Does the same method work for removing mould from silicone around a shower enclosure?
Yes. The bleach contact-pad method works on shower silicone exactly as it does on bath sealant. Shower enclosure joints often see heavier mould growth because of more frequent water exposure and less drying time between uses. For vertical joints on a shower screen, secure the soaked pad with a piece of cling film to maintain contact with the surface. Keep the shower door or screen open and the extractor fan running throughout.
Can I use these methods to remove mould from silicone sealant around windows?
Yes, with one adjustment. Window silicone is usually exposed to less sustained moisture than bathroom sealant, so lighter mould tends to respond well to white vinegar alone. Apply soaked cotton pads and leave them for one to two hours. You often don’t need bleach at all. For external window sealant, avoid leaving bleach in contact for extended periods in direct sunlight, as it can dry prematurely and become harder to rinse away.
Is the mould on your silicone getting out of hand?
Enter your postcode to view our rates and availability in your area.
For questions about the services we offer visit our main site
Conclusion
Removing mould from silicone sealant isn’t complicated, but it does require the right approach. Contact time is the thing most people overlook, and it’s the thing that makes the biggest difference. Whether you go with bleach for a heavy infestation or vinegar for lighter maintenance cleaning, the principle is the same: get the solution against the surface and leave it there long enough to do the job.
Prevention is what keeps you from having to repeat it. Good ventilation, regular wiping down, and using mould-resistant sealant when you next reseal will slow regrowth considerably. If the sealant is beyond saving, replace it. A fresh bead of quality silicone is a much better starting position than trying to clean mould out of material that’s already deteriorated.







Leave a Reply