Defrosting a freezer to clean it is a chore which comes around every once in a while, usually around the spring cleaning of the home. But let’s be honest, when it comes, you dislike every second of it. Most new freezers come with a built-in frost-free feature, but we’re guessing you don’t have that, otherwise, you wouldn’t be reading this post. Fear not, dear reader, as here you will learn why and how to defrost your freezer quickly.
Table of Contents
What happens if you don’t defrost your freezer?
There’s something called ice build-up, which you don’t want in your freezer. It takes up valuable space where your food should be and prevents the circulation of cold air.
In the long run, it will cost you more energy because the freezer will be working harder to keep the ice block frozen. A telling sign that points to a problem is your food not being as cold as it should be. Not only that, but if the ice block gets too big, it might even stop the door from closing properly.
How to easily defrost your freezer
- Prepare freezer for defrosting – During the week leading up to the defrosting, eat and cook as much of your food as you can. That way, you will not only cut down on potential food waste, but also make it easier later when you start defrosting. An alternative is to put all your food in a neighbour’s freezer until yours is back up and running.
- Unplug your freezer and secure it with towels – Put dry towels at the bottom of the appliance if you want to go through the defrosting without getting water everywhere. Keep an eye on them and wring them out when you find they can’t absorb any more water.
- Put the fridge’s drainage hose in a bucket to help carry the water away – not all freezers have this, but if yours does, use it.
- Remove freezer compartments – these include shelves, holders of any sort and drawers. Mind you, if some parts are hard to remove due to the ice, don’t use force. Instead, just wait until no more ice is surrounding them. Also, wait until they reach room temperature before cleaning them. Otherwise, they might crack. Make sure they’re dry before putting them back into the freezer.
- Speed up the defrosting by placing a bowl of hot water inside – hot water will make the ice soften faster, usually within 15 to 20 minutes. Change the bowl as soon as the water becomes mild and no longer emits steam.
- Scrape ice from the freezer walls – use a wooden spoon or ice spatula at best, but no sharp pointy objects such as knives. Knives will likely damage the walls and any exposed cooling pipes if they happen to slip.
- Remove ice blocks – if a piece falls on the floor of your freezer, throw it in your sink right away. Don’t leave it there, or it will melt before you know it.
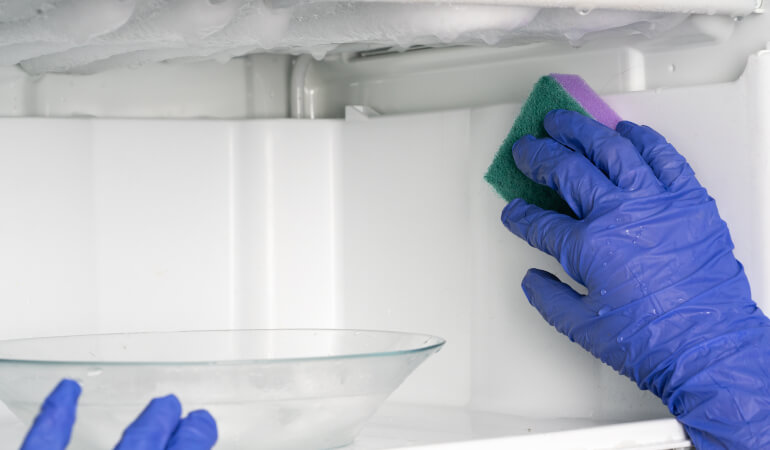
- Dry the freezer and clean it afterwards – this is the perfect opportunity to deep clean the freezer interior. Use soap and water and rinse well. Afterwards, make sure it’s perfectly dry.
- Switch it back on – By this step, you are probably wondering when to put the food back in the freezer after defrosting. It’s important to give the freezer enough time to reach its natural cold temperature before placing anything back inside. This may take up to 6 hours, but it’s important because otherwise you might end up with the same problem you were trying to fix.
Can you defrost a freezer without turning it off?
Frankly, you can’t, and we don’t condone any such practice. However, the ice build-up will not melt if the freezer is turned on and is trying to compensate for the cold air escaping through the open door.
Trying to remove the ice with a sharp object will likely result in damage to the equipment and injury to yourself. So, it would be easier if you turned the freezer off.
How long should I defrost my freezer?
Defrosting will most likely take anywhere from 2 to 12 hours. It all depends on the thickness of the ice and whether or not you are trying to speed up the defrosting with additional methods, like the hot water or the salt hack mentioned earlier.
Speaking of making ice melt faster, we have to warn against the idea of using a hair dryer to speed things up. This poses a serious health and safety risk because of the possible contact of water from the melting ice and electricity from the hair dryer. Furthermore, using a hair dryer for a long period of time in such a confined space can cause overheating.
Why does frost build up in the freezer?
When warm air from the outside enters the freezer, the cold temperature inside causes the moisture to transform into frost. That frost accumulates on the inside walls and floor. Warm air always sneaks in when you open and close the door and that’s normal. Frost starts to build up when there’s too much warm air. That is usually the result of:
- Putting warm or even hot food inside the freezer;
- An old door seal which is need of replacing.
How often should you defrost your freezer?
Once a year is enough, but that’s not set in stone. If you see a thick block of ice forming up, you know the time has come to defrost your freezer, regardless of whether it’s been a year since the last defrosting or less.
Take advantage of professional appliance cleaning!
If you feel like the chore of cleaning your freezer is too time-consuming and tiresome, maybe Fantastic Cleaners can help you out. The professionals we work with are highly skilled and fully equipped to clean not only your fridge and freezer, but many other appliances too. Save time and book online in just a few minutes!
Need a cleaner?
Find a professional to take care of your freezer’s cleaning.
Enter your postcode to view our rates and availability in your area.
For questions about the services we offer visit our main site
Takeaways
- Unplug the freezer before starting any cleaning.
- Place towels inside so they absorb the melting ice.
- Make the defrosting process a little bit faster by placing a bowl of hot water inside the freezer.
- Use a wooden spoon to break off the ice, not a knife.
- Clean the inside of the freezer with water and soap.
- Make sure the freezer is completely dry before turning it back on.
- Wait until it reaches its normal temperature before putting your food back in.


Leave a Reply